How to Use Carousel Creator: One Brand, One Series, Carousels Written and Rendered While You Sleep
 Arun Philips
Here is what one Carousel Creator setup delivers when you configure it once and leave it running: a new branded LinkedIn or Instagram carousel every weekday, each one researched, written in your voice, and rendered with your logo and colours, waiting in your drafts for a single tap to approve and schedule. No Canva, no copywriting session, no export. The series keeps publishing.
That is the outcome. This post is the how.
🧭 What Carousel Creator actually does
The card's own description says it plainly: Researches, writes and renders a branded carousel on your schedule. You approve every one before it posts.
Behind that one sentence sits a four-stage pipeline. First, an idea generator reads your brand brief, your past posts and your evergreen angles to score and rank what to write next. Then a researcher pulls real-time context — articles, stats, quotes — from the web so every slide has a cited source. A copywriter then drafts the slides in your brand voice, following your rules (no em dashes, headlines under nine words, one idea per slide). Finally a renderer composes your full branded carousel as PNG slides using your logo mark, your palette and your chosen fonts, and adds platform captions ready for LinkedIn, X and Instagram.
The whole thing lives on your Dream Board, in the Content column, as a card called Carousel Creator. Look for the small (i) icon on the card: it links back to this guide.
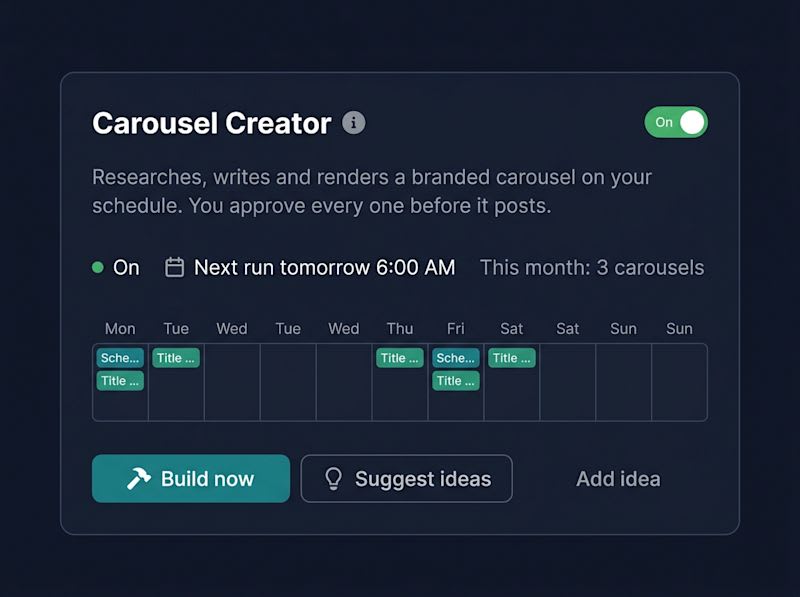
The Carousel Creator card. The (i) icon opens this tutorial.
✅ Before you start: get your brand ready
The Carousel Creator renders using your exact brand identity. Before you enable it, two things must be in place on your Brand & Design card.
1. Add a square transparent PNG as your logo mark.
Go to Brand & Design, scroll to the Render Assets section, and upload a square transparent-background PNG. This is the mark that appears in the footer of every slide. A 512×512 or 1024×1024 file works perfectly. The renderer rejects any image that is not a PNG with a transparency channel, so export specifically from your design tool as PNG with alpha.
Once uploaded, the field below the upload box shows the public HTTPS URL. If it shows a warning instead — "The brand logo mark must be a public https URL" — the URL did not save. Re-upload the file or paste the URL manually into the field.
2. Set your palette.
In the Palette section, add at least one hex colour. The renderer derives ink, accent and muted tones from whatever colours you enter. Two or three colours give the best results. You can label them (Primary, Secondary) and the renderer will pick them up automatically.
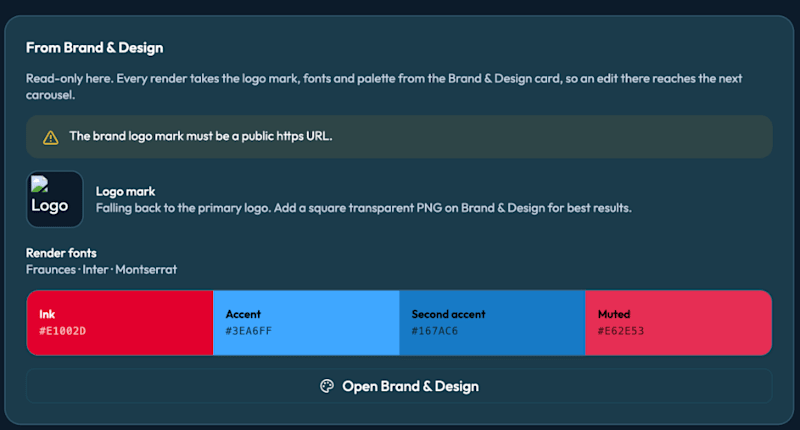
Upload your square transparent PNG here. The URL must be a public https link.
Once both are in place, go back to the Carousel Creator card. The yellow warning will be gone and the Build now button will be active.
1️⃣ Step 1: Open Carousel settings and name your series
Click the gear icon on the card or go to Carousel settings. The first tab is Brand & Series.
Give your series a name — this appears in the footer eyebrow of every slide, for example "Wordsmiths Corner · Sep 2026". The eyebrow format is fully customisable: the default is {series} · {date} but you can change it to anything.
Set the slide count (5 to 8; 6 is the sweet spot for most topics) and choose a footer style. The light footer puts your logo mark and series name on a white band. The minimal footer embeds them subtly at the bottom edge.
Save. A preview renders the first two slides with sample copy so you can confirm your colours and logo look right before the first real build.
2️⃣ Step 2: Set your voice and rules
Still in Carousel settings, open the Voice tab.
The default voice rules are a good starting point: no em dashes, no 🚀 emoji, headlines under 9 words, one idea per slide, bold at most two phrases per slide.
Add your own rules in the same list — one rule per line. Examples: "Always mention the community by name", "Use second person (you, your) throughout", "Never use the word journey".
The Evergreen angles field is a list of topics or frames the idea generator draws from. Think of these as your content pillars: Writing craft, Book launches, Author marketing, Reading habits. The more specific you are, the more targeted the ideas.
3️⃣ Step 3: Enable the card and fill the idea backlog
Flip the Carousel Creator toggle to on. The system immediately generates a batch of 10–15 scored ideas. Each idea has a title, an angle — the specific take or hook — and a score from 0 to 100.
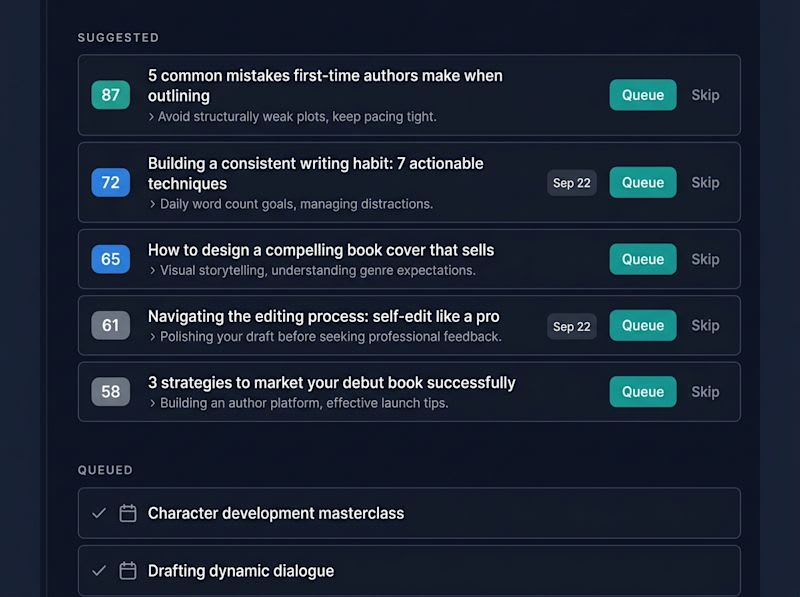
Suggested ideas scored and ranked. Queue the ones you want; skip the rest.
Browse the backlog and queue the ideas you like. Queued ideas are picked up in order at your next scheduled build. You can also set a specific date on any idea — it will be held until that day. Ideas you skip are removed from the queue. The generator runs every day and adds fresh suggestions.
4️⃣ Step 4: Approve your first draft
At your build hour (the default is 6 AM in your dream's timezone), the system picks the top-scored queued idea, researches it and renders the full carousel. Twenty to thirty minutes later, the draft appears in the Drafts tab.
Open the draft. You will see every rendered slide as a full-resolution PNG, the caption for each platform — LinkedIn, Instagram, X — pre-written and trimmed to each platform's character limit, your Instagram hashtags, and a proposed posting time.
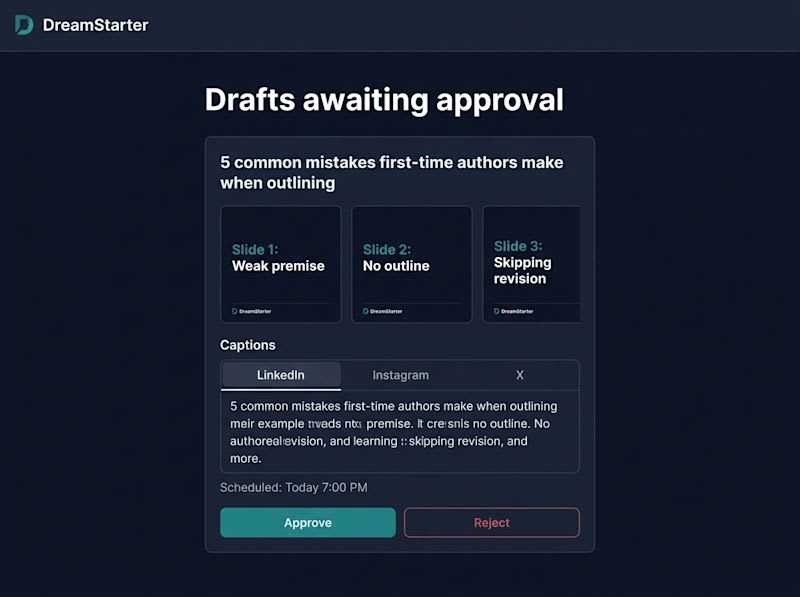
A finished draft. Edit the caption, then tap Approve to schedule it.
You can edit any caption before approving. If the copy missed the mark entirely, hit Reject and write a brief reason — the system learns from rejections and avoids the same mistake next time.
When you approve, the carousel is scheduled into your posting queue at the proposed time. From there it behaves exactly like any other scheduled post: you can edit captions or reschedule from the Approvals screen.
💰 Cost and monthly budget
Each carousel build costs between 5 and 15 credits, depending on the copy model chosen and the number of slides. The default budget cap is $8.00 per month, which comfortably funds one carousel per weekday.
You can raise or lower the cap in Carousel settings → Run settings. Builds stop automatically when the cap is reached and resume at the start of the next calendar month.
💡 Tips for the best results
Keep the series name short. It appears in the footer eyebrow next to the date. Three to five words fits the layout.
Use a transparent PNG for the logo mark, not a white-background JPG. The footer background is not always white, and a white rectangle around your logo breaks the design. Ask your designer for the PNG with alpha.
Write a few specific voice rules before the first build. The defaults are neutral. Adding two or three rules specific to your brand — even just "Write for fiction writers, not business coaches" — noticeably changes the tone.
Queue more ideas than you need. If the backlog runs dry the agent skips the build for that day. Aim for at least five to seven queued ideas at all times.
Reject bad drafts with a specific reason. "Too generic, did not mention the community" or "Lead slide was too long" trains the system faster than a one-word rejection. Lessons from rejections appear in the Voice tab so you can see what the agent has learned.
The Carousel Creator is one of the cards on the DreamStarter board. Every card in the Content column — Video Clipper, Niche Replies, Carousel Creator — runs on the same posting queue, so approvals from any card land in the same schedule. You manage everything from one place.